Productionizing dbt as a Cloud Run Job: Infrastructure Management with Terraform and CI/CD with GitHub Actions - Part 2
This is the second part of the three-part series to get a dbt job into production. Previously we saw how to get the dbt job running locally. Our end goal would be to deploy the dbt job as a Cloud Run Job with the infrastructure managed by Terraform and the CI/CD is managed using GitHub Actions.
Once we complete the setup, pushing a code or merging to the main branch in GitHub will start the following.
- Build a docker container with our dbt job code
- Push the docker container to the GCP Artifact Registry
- Perform any unit testing (If we have any)
- Build the resources from the configured Terraform code - build the Cloud Run job and use the container created in step 2, create the BigQuery database, create the IAM needed and provide necessary access, and create a scheduler for the Cloud Run Job
All these steps happen in the background, so the user will not even realize it happening.
Terraform Code
Let us try to cover the Terraform side in this article. In case you are new to Terraform, please follow my previous articles titled “Getting Started with Terraform with GCP” which should cover the basics of installing Terraform on your local system and managing the GCP resources.
If you already have Terraform installed, let us continue with configuring the resources needed to run our dbt job in GCP.
In our project home directory, we create a folder named infra which would hold all the terraform code.
First, we create the providers.tf which holds the provider information.
providers.tf
1
2
3
4
5
6
7
8
9
10
11
12
13
terraform {
  required_providers {
    google = {
      source  = "hashicorp/google"
      version = "5.21.0"
    }
  }
}

provider "google" {
  project = var.project_id
  region  = var.region
}
Next, we create the backend needed to store the terraform state files in a GCS bucket.
backend.tf
1
2
3
4
5
6
7
8
terraform {
  backend "gcs" {
    bucket = "terrafom-state-files"
    prefix = "moduleB/terraform/state"
  }
}
And then we create the code for our Cloud Run job. We can configure the resources needed but we have kept it a minimum value of 2 CPU cores with 8GB memory. We also pass the docker container path which holds our dbt code. We will see how the value is passed to this variable var.gar_image in our next article when we cover the GitHub Actions part. For now, let us assume this would be the Artifact Registry location for the dbt job’s Docker container.
cloudrun.tf
1
2
3
4
5
6
7
8
9
10
11
12
13
14
15
16
17
18
19
20
21
22
23
24
25
26
27
28
29
30
31
32
33
34
35
36
37
38
39
40
locals {
  cpu    = 2
  memory = "8Gi"
  env_vars = {
    DBT_TARGET = "dev"
    PROJECT_ID = var.project_id
    REGION     = var.region
    DATASET    = resource.google_bigquery_dataset.dataset.dataset_id
  }
}
resource "google_cloud_run_v2_job" "jaffle-shop-job" {
  name     = "jaffle-shop-dbt-job"
  location = "us-central1"

  template {
    template {
      containers {
        image = var.gar_image
        dynamic "env" {
          for_each = local.env_vars
          content {
            name  = env.key
            value = env.value
          }
        }
        resources {
          limits = {
            cpu    = local.cpu
            memory = local.memory
          }
        }
      }

      service_account = google_service_account.service_account.email
      max_retries     = 1
    }
  }


}
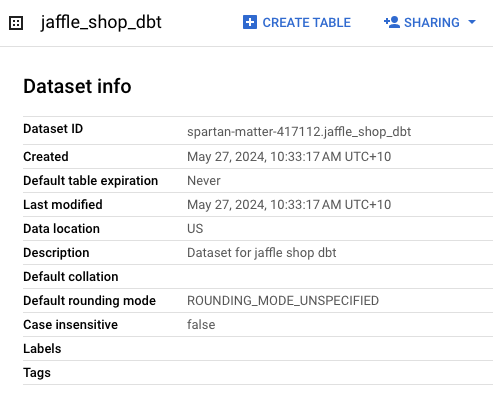
Next, we create the BigQuery dataset which would be used by our dbt job.
bigquery.tf
1
2
3
4
5
6
resource "google_bigquery_dataset" "dataset" {
  dataset_id    = "jaffle_shop_dbt"
  friendly_name = "jaffle_shop_dbt"
  description   = "Dataset for jaffle shop dbt"
  location      = var.region
}
We need to maintain the IAM needed for the job and provide the roles needed.
iam.tf
1
2
3
4
5
6
7
8
9
10
11
12
13
14
15
16
17
resource "google_service_account" "service_account" {
  project      = var.project_id
  account_id   = "cloud-run-worker"
  display_name = "Cloud Run Service Account"
}


resource "google_project_iam_member" "member-role" {
  for_each = toset([
    "roles/run.invoker",
    "roles/bigquery.dataEditor",
    "roles/bigquery.jobUser"
  ])
  role    = each.key
  member  = "serviceAccount:${google_service_account.service_account.email}"
  project = var.project_id
}
And then finally, we will create a scheduler to run the job daily at 8 AM.
scheduler.tf
1
2
3
4
5
6
7
8
9
10
11
12
13
14
15
16
17
18
19
20
21
resource "google_cloud_scheduler_job" "job" {
  name             = "daily-cloud-run-job"
  description      = "Runs a Cloud Run job every day at 8 AM"
  schedule         = "0 8 * * *" # This schedule is for 8 AM daily
  attempt_deadline = "320s"
  region           = "us-central1"
  project          = var.project_id

  retry_config {
    retry_count = 3
  }

  http_target {
    http_method = "POST"
    uri         = "https://us-central1-run.googleapis.com/apis/run.googleapis.com/v1/namespaces/${var.project_id}/jobs/${google_cloud_run_v2_job.jaffle-shop-job.name}:run"

    oauth_token {
      service_account_email = google_service_account.service_account.email
    }
  }
}
We also create a file for the variables used in our code. All these values would be passed by GitHub Actions.
variables.tf
1
2
3
4
5
6
7
8
9
10
11
12
13
14
variable "project_id" {
  description = "GCP Project ID"
  type        = string
}

variable "region" {
  description = "GCP Project Region"
  type        = string
}

variable "gar_image" {
  description = "GAR Image Location"
  type        = string
}
Check Terraform on Local
Once we have all the code ready, we could run the below code to see if the configurations are all valid.
We could test from our local to see all the resources are created. But to make it work from our local, let us first comment out the file backend.tf so that it doesn’t use the GCS bucket to store the state files and uses our local filesystem.
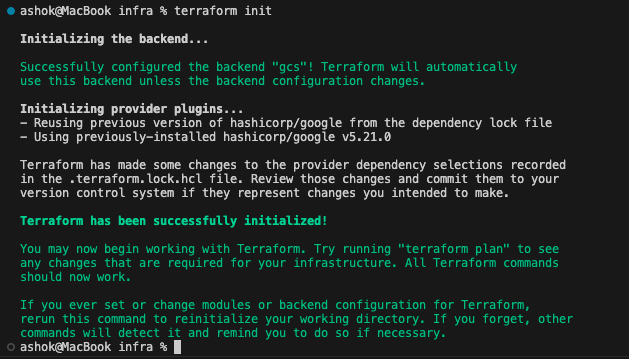
Let us run terraform init to initialize. 
Now if we run terraform plan it would prompt for the values to be used for the variables we have configured. Enter the values and proceed.
Once we enter the details, terraform will show the plan which is to add 7 resources.
We can run terraform apply to create the resources. Once we enter the values for the variables as earlier, it will show the plan for the resources that would be created.
Take a moment to go through the plan and understand what resources would be created. Once you are happy with the plan, hit yes and we get the output like below showing Apply complete!
If we check GCP, we would be able to see the resources that were created now.
We are happy with the results. But in reality, we might face a few hiccups to reach this point. The terraform code might show a few statements are invalid, there could be some syntax error in terraform, the terraform plan might fail due to configurations, once the plan is successful, terraform apply` might fail due to any access, etc.
In some cases, you might not have access to run terraform from your local system due to company policies. In that case, the only way is to make the change and push the code, deploy the infra from the CI/CD tool of choice, check for any errors, fix and retry. On a bad day, this could be an endless loop.
Terraform Destroy
Once we are happy with the terraform let us destroy the resources that we created from our local so keep the resources clean and only the CI/CD is supposed to keep track of the terraform state files.
Let us run terraform destroy to delete all the resources that we created. Once we enter the variables prompted, it shows 7 resources are to be deleted which is what we expect as well. Type ‘yes’ and proceed.
All the resources are destroyed. In our next article, let us include GitHub Action to this mix to create the Docker container from our dbt code and also to manage terraform.


